Christmas and New Years celebrations and visits are finally over and I can finally get back to crafting and blogging about my crafted creations. Its been such a long time since my last blog post, that I am sure people are wondering whatever happened to Irene from My Crafted Creations? But rest assured, I am still here.
Christmas is what happened to me and why I haven't been very active in the blogasphere. Whilst December was already busy preparing for Christmas, I also held my very first craft classes, three if you count the girl's night in crafting session, which I facilitated. I also had a go at selling my creations at a local market which got some very mixed responses. I am glad that I gave it a try though as it was a great learning experience. Amidst all of this, I had my full-time job to attend, a family to run and the day-to-day ruckus. So its fair to say that December was a very busy month. And although the blog was a little neglected, it doesn't mean that crafting wasn't on the agenda. There was definitely a lot of crafting going on in December, in particular for Christmas.
Those who know me well, knows that Christmas is one of my favourite time of the year. Growing up, I remember feeling a bit left out around Christmas time as my family do not celebrate it. My husband's family do celebrate it however and it was very exciting for me when I was finally able to participate. Every December, since meeting hubby, I would help my [now] mother-in-law with the tree decorations, and Christmas crafts. I have to give a great big thanks to my mother-in-law Mrs G, who first introduced me to the world of crafting. It was with her that I first discovered the satisfaction of creating through craft. So fast forward a few years, and the time came to host Christmas dinner in our own house with all the trimmings. I was beside myself. Since that first time, every year I try to make Christmas more and more meaningful and epic, especially when the kids came along.
It would be fair to say that our Christmas celebration is a little different, since our families have different cultures and religious backgrounds. But for me, the joy comes from seeing both families come together, sitting around one table, giving thanks for one another and sharing a meal, stories and laughs. I feel very blessed and privileged to create such a space. Its definitely a magic moment even if it is just for one day of the year - you could say, it's the "Magic of Christmas" to quote the cliche.
There's so much I love about Christmas, as it incorporates those aspects of my life I generally love doing anyway, like spending time with family, catching up with friends, crafting, decorating, baking, shopping, and especially gift giving. Christmas 2016 was no different, and I thought it would be appropriate for my first blog post this year to be about Christmas. I would love to share all the different ways I like to make Christmas feel and look a bit more special.
I am really excited to share this project, it was a collaboration between my husband N and myself. N is quite the handyman, and he loves woodwork. Me made this rustic Christmas tree from left over pallet wood, and stained each piece with a different shade and gave it the aged look. I then put my decorating skills to some good use. We're both very happy with how it turned out.
Above my kitchen island bench, I usually hang garlands, but instead, this year I decided to hang these branches I picked up from the side of the road. It had been cut down left on the footpath. I took a few branches home, cleaned them up, took off all the dead leaves. Was going to take the gum nuts off as well, but glad I decided to keep them as they added a special effect. I hung them with fishing wire and 3M hooks. I chose very light weight decorations as I didn't want the branches to get too heavy. I think it looks really lovely and very much a homage to an Aussie Bush Christmas.
Scattered pinecones, assorted sizes placed all around the house. Hubby N has a thing for cloches and birdcages, so this is his caged pinecone decoration. Not too shabby!
Can't decide whether to call it a Stampin Up tree or a Tree of cards. If you look closely, you will recognise many Stamping Up products like
Delicate ornament thinlits and
Embelished ornament stampset, or the
Flurry of Wishes stampset and
Snow Flurry punch and many more. Placing cards under the tree happened organically, my boys started to put the cards they received from their friends each day, and they just kept doing that until Christmas. While it was not my intention, I quite like the idea, might do it again next time.
This is another one of my husband's creation, he created a wreath out of tree twigs, and I decorated it with small pinecones. I think it came together very nicely.
I'm in love with birds sitting on my Christmas tree, every year my collection of birds gets larger, and one day, the whole tree will be decorated with birds, that will be so awesome.
I love fresh flowers in my house at all times, but particularly during Christmas. I like to make my own arrangements.
I usually make my own Soy Candles, various Christmas Fragrances. Which I usually burn couple of weeks leading up to Christmas. They are great as gifts for family, friends and colleagues. This time I decorated the candle jars with
pretty pine leaves for that festive look.
The Olive leaf wreath was a hit as well with hubby using it as faux mistletoe and trying to steal a kiss every time he caught me standing under it. Even my youngest boy got into it - cheeky little bubba!
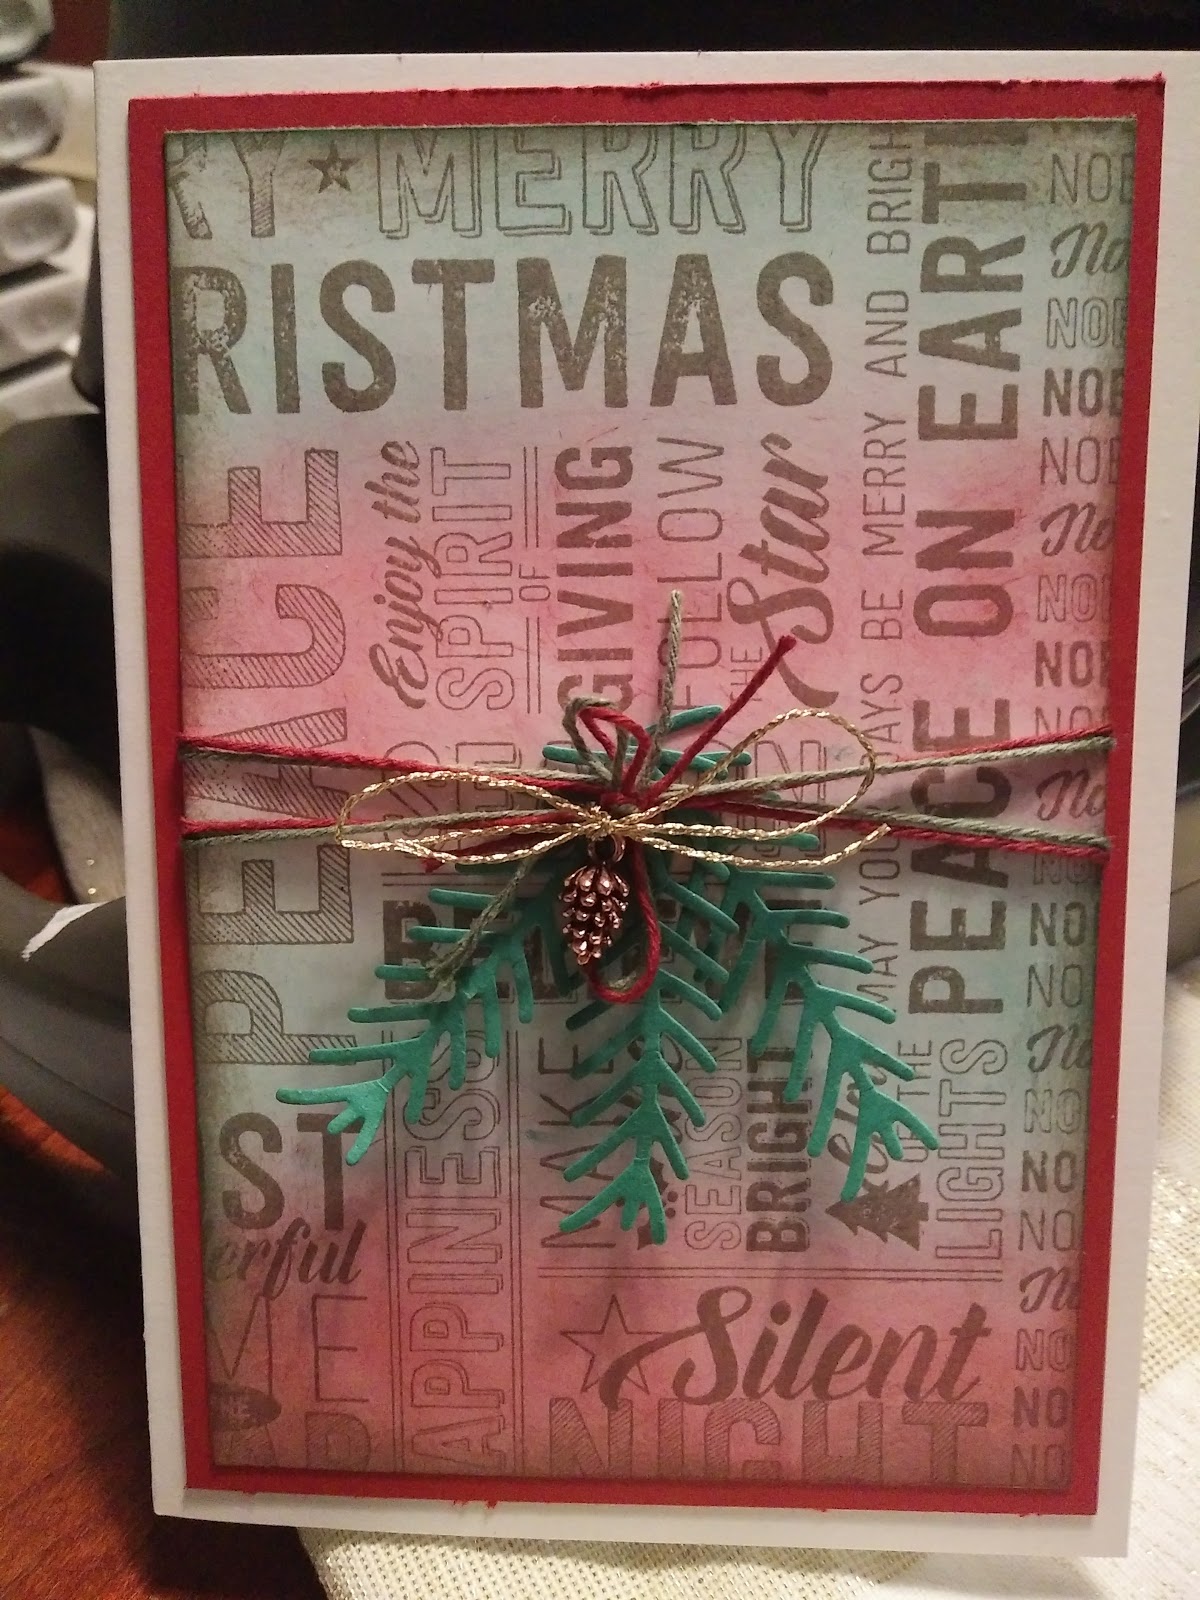
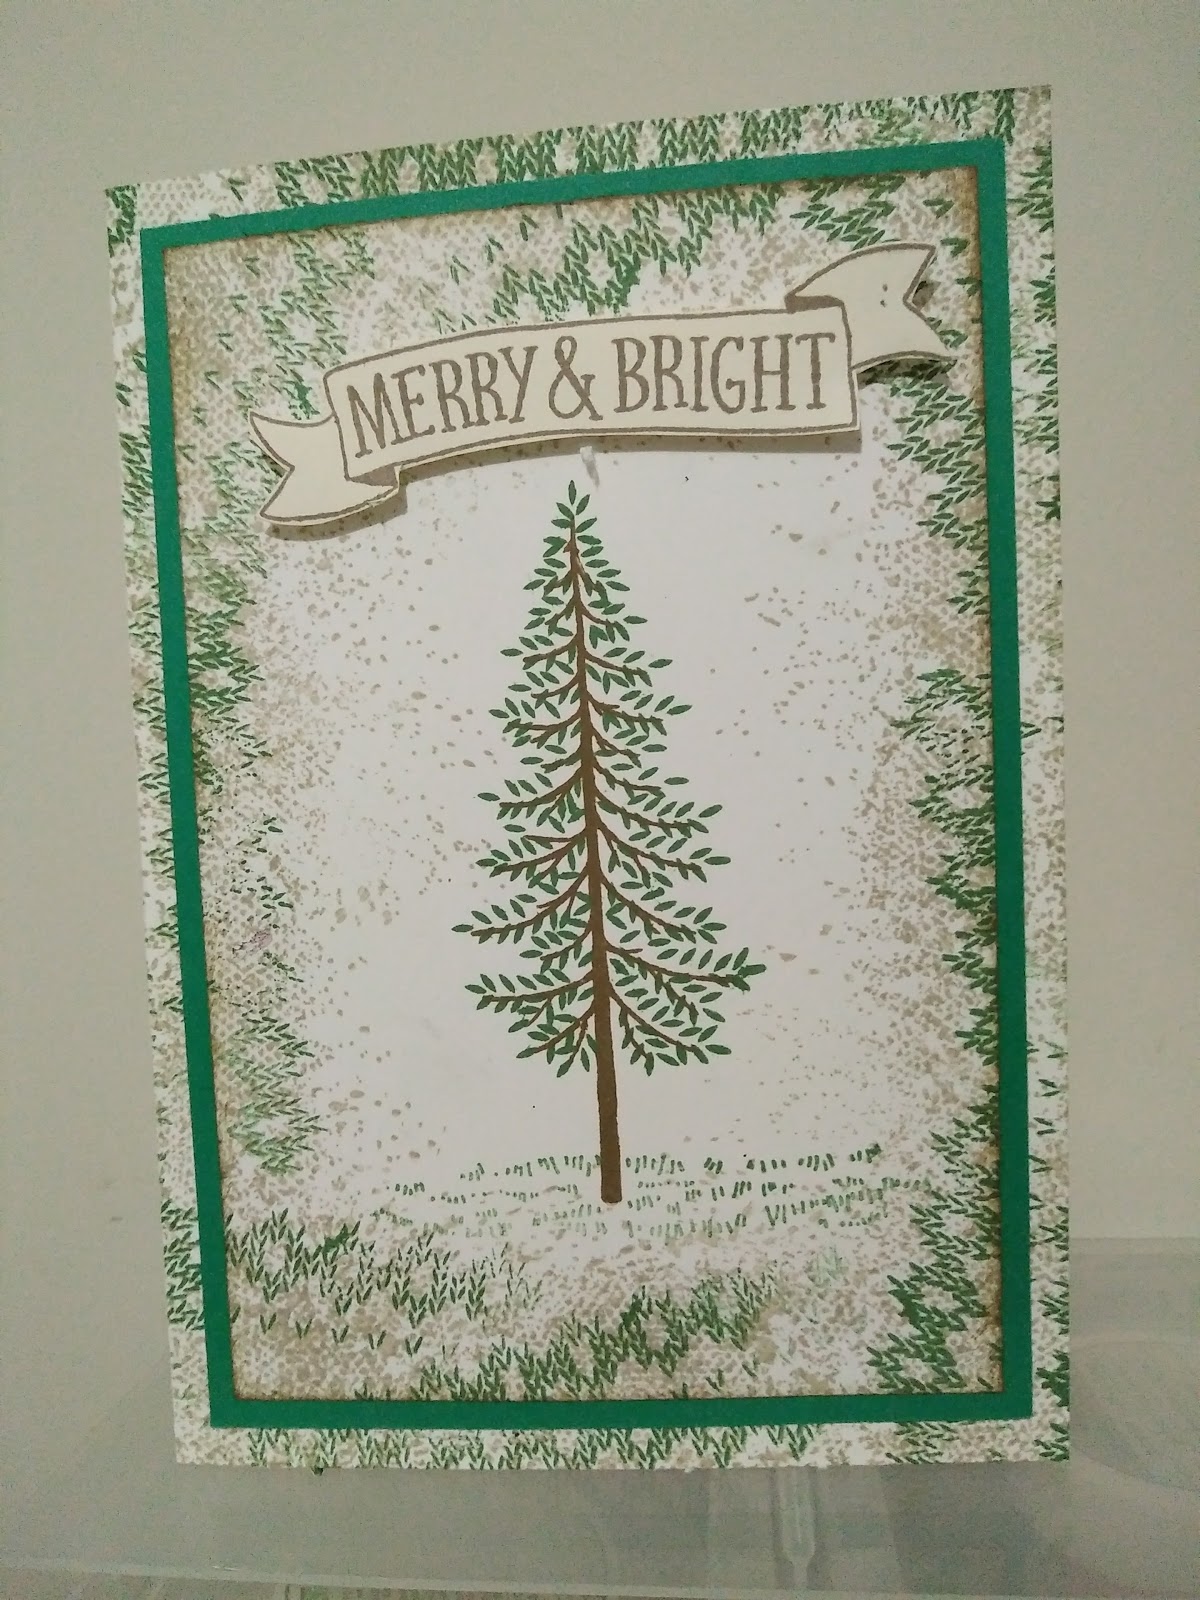
I like to decorate my own wreath, both for outside and inside the house, they look special no matter where you hang them. Both of these wreaths are decorated with Stampin Up material and tools.
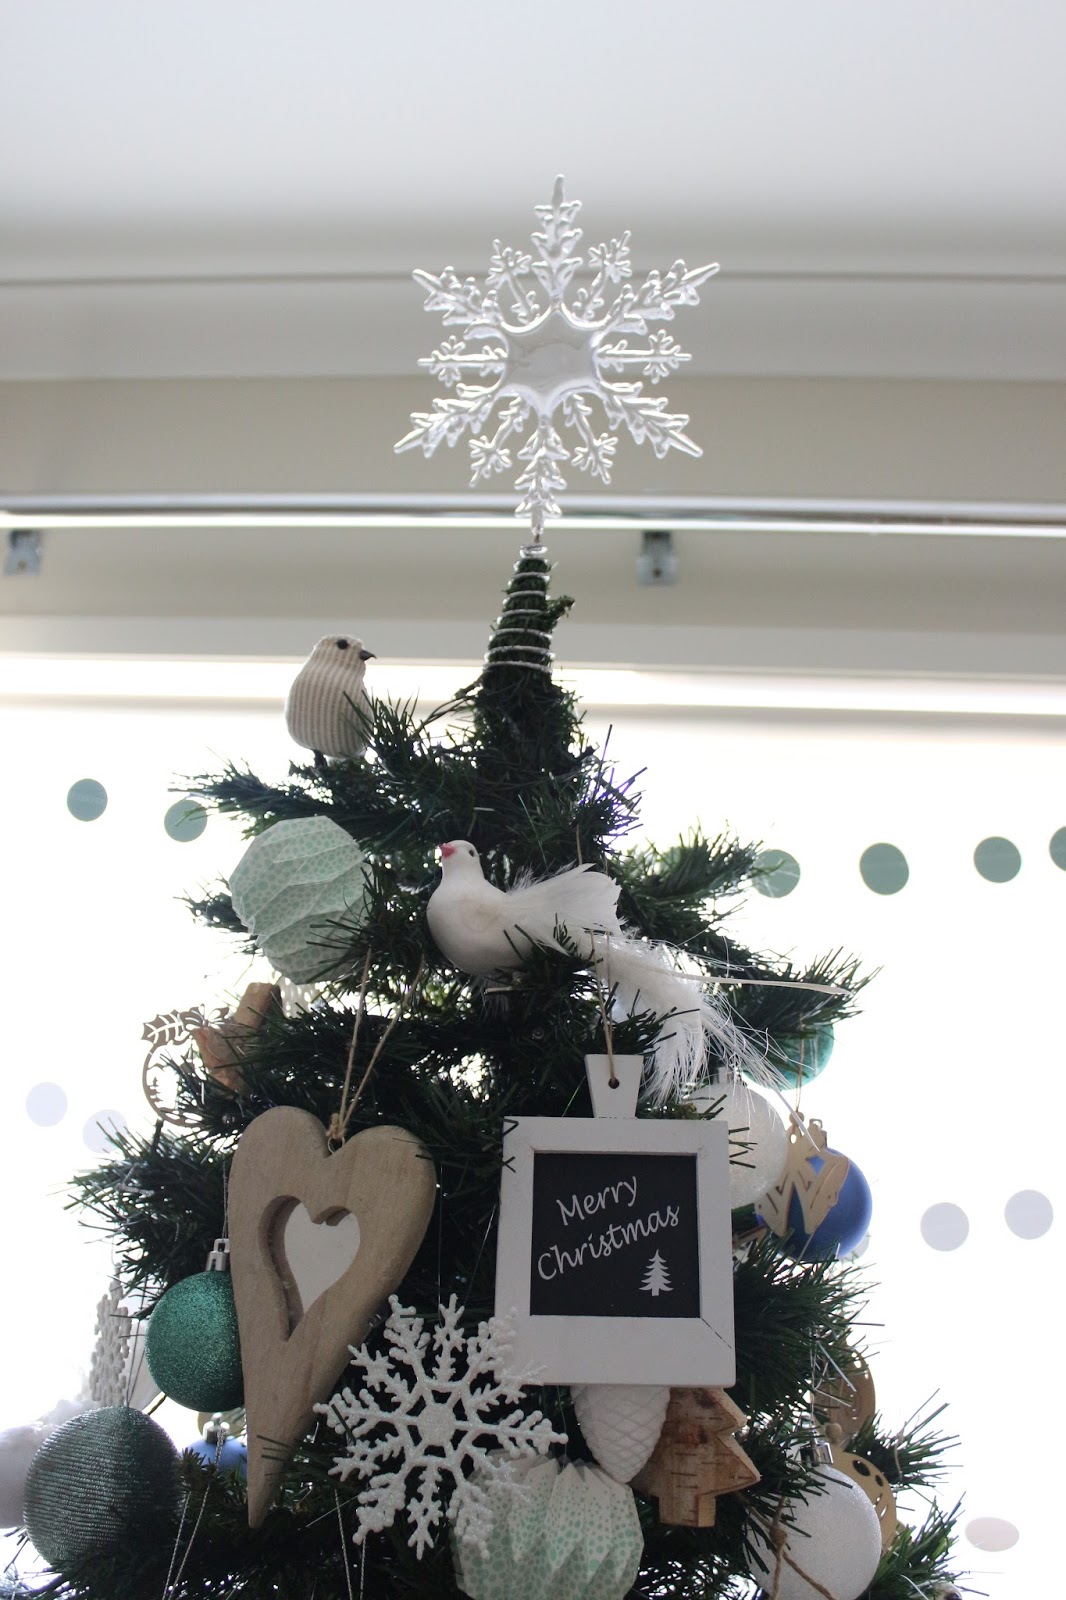
I love my Christmas tree, I have had the same tree for over thirteen years and it still managed to retain its shape and foliage. I tend to go with different combination of colour each year, but for the past two years I have stayed with this combination, mix of white, naturals and shades of blue. I quite like this combination.
A crafty friend shared a video on FB on how to turn empty wine bottles into beautiful centerpieces. So when I saw these large poinsettias, I knew exactly what I needed to do. They look better than I expected, so worth the effort. A big thanks to my hubby N for making me a very thin sofa table, that he custom built to fit perfectly behind our formal lounge. I'm sure it is going to feature as a mini stage for my crafted creations throughout the years to come.
It goes without saying, that I make my own Christmas cards and tags, it just wouldn't be right if I didn't. My boys also decided that they would also make Christmas cards for their friends, I regret not taking photos of them all. Suffice to say that I am one proud Mama - Who says boys don't like crafting?
Finally, table settings. I made some napkin rings and decorated them with the
pretty pine leaves, this item was undoubtedly the most used tool I bought for Christmas. I love using real pine leaves where I can with my decorations, but they always dry up too quickly. Stampin' Up's Pretty pine leaves never die, so the decoration always makes it through the festive season.
I also decorated the Bon Bons with extra Tags I had left over. Here is some of the family enjoying Christmas brunch on the 25th - tummies were full, food was great and the table decorations were perfect - Did I mention that I love Christmas?
Well that's it for my crafted Christmas. Thanks so much for visiting. I do hope you enjoyed looking through all my Christmas creations, hope to see you again soon.


