Tuesday, 27 June 2017

Eastern Beauty Eid Cards


Eid Mubarak to all my family and friends near and far, hope that it was a beautiful day for you as it was certainly for me. After fasting for 30 days for Ramadan, it was a well deserving celebration. The highlight for me was definitely the kids receiving their Eid money,  but they all had to tell us one thing they learnt about Ramadan to be able to receive the money. I was glad to see that they all were able to say a few thoughts on Ramadan, even my little one who is only four years old. So proud of them. 
The other highlight for me, apart from food that my sister-in-law cooked for us, was speaking to all my family in Bangladesh on video call on Messenger. This is one of the times I love technology as it made it possible for us in Melbourne, Australia to not only speak to my family in a remote village in Bangladesh, but also to see their happy and beautiful faces, which was just amazing. We got to see how they look in their new Eid clothes and how intricate their henna art work was on their hands, see relatives I hadn't seen in ages. That was a perfect way to end the Eid celebrations.

Traditionally, we don't usually exchange cards on Eid, but I am trying to change that. I think cards are a lovely way to say to one another that you case, and that your thankful and grateful and blessed to have them in your lives, which is perfect because that to me is what Eid is all about. Here are some of my Eid card creations, I'm very proud of how they turned out.

Another of the highlights of this Eid for me were the Eid cards I have created for my families and friends. They were very well relieved, these cards made Eid a bit more festive and special this year.
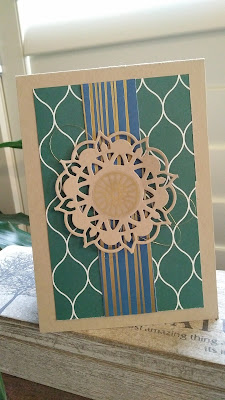
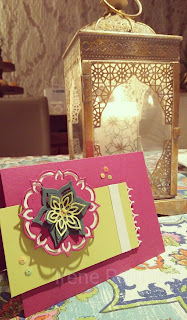
For my Eid cards this year, I have used the Eastern Palace suite of products to make it look more exotic and majestic. Don't you think these look like the types of cards the Sultan of Akrabar, or Princes Jasmine would receive on Eid? I think so anyway, I am really quite proud of how they turned out.


For these ones, I have combined the Eastern Beauty bundled with Paisleys framelit dies, I think these two sets go perfectly together. To give it the aged look, I have also used the Touches of Texture stamp set, which I stamped around the edges. I just love this colour combo, Tranquil Tide and Fresh Fig, never thought to use them together as they are both dark colours, but they I think they look great together.


For my inspirations, I have browsed Pinterest for days, in hind side, I think I may have spent too long searching, as every idea I had come up with had an element of the cards I had seen on Pinterest. Therefore, some of this cards may look a bit similar to the ones on Pinterest, but I have changed them to make them my own. Note to self, next time limit your Pinterest time to one hour the maximum. 


I love how this card turned out, it looks amazing with the tassel and the gold ribbon. You might be wondering where did that paper come from as the one in the DSP pack doesn't have the gold in the pattern. Well this is where I changed it a little. I coloured in the paper with wink of stella - the gold one which I now is retired but can work just as well with the clear one as well. It just so happens that I had a gold theme going, which is why I used gold.


I wanted to make a card that was not too difficult to make, using the DSP as the main focus. Here are some cards that are quite simple, not to many layers and elements, perfect for the new crafters.


Thank you for visiting my blog today, hope you have enjoyed browsing through my projects and found some inspirations. If you like what you see, please leave a comment or two below, or simply click on one of the reaction buttons to let me know what your thoughts are about my creations. I value your opinion and I am always looking to improve my craft through constructive feedback from my guests/readers. I am also looking to expand my audience base, so please feel free to share my creations within your social circle.

Friday, 23 June 2017

Ink It! Stamp It! Blog Hop - New Catalogue Theme


Ink it! Stamp it! Blog Hop - NEW CATALOGUE theme


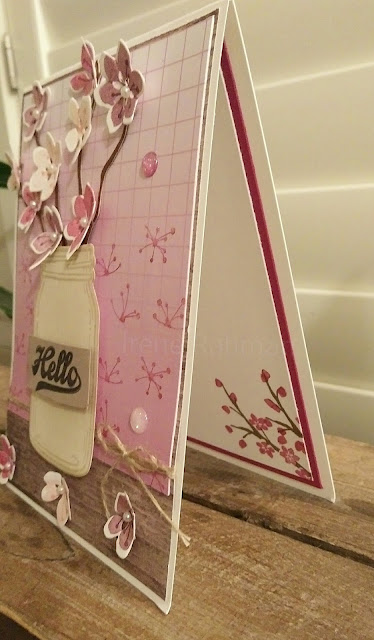
If have chosen my one of my favourite bundles to showcase the new catalogue, illustrating how versatile this set is. This bundle is called  'colourful seasons'. Its a perfect set to crate seasonal themed cards, great for craft classes and workshops. It can also be used in conjunction with older products for the catalogue, as you can see below, I have used it with the jar of love bundle. 


I'm really excited to show you what I created to compliment the card. Yes! it is cherry branches! I used real branches and stuck on the cherry blossoms with glue dots. It took me ages to stamp and cut out each blossoms, but the end result makes it so worth it. I am very happy with how these projects turned out. I specially love the branches, they are sitting on my floating shelf in the family room. Looks amazing.


Thank you for visiting my blog today, hope you have enjoyed browsing through my projects and found some inspirations. If you like what you see, please leave a comment or two below, or simply click on one of the reaction buttons to let me know what your thoughts are about my creations. I value your opinion and I am always looking to improve my craft through constructive feedback from my guests/readers. I am also looking to expand my audience base, so please feel free to share my creations within your social circle.

Sunday, 18 June 2017

Crazy Crafters Blog Hop withJeanette Egemann


For my inspiration, I have chosen the above design of Jeanette. This design appealed to me as I was I in the midst of making quite a few cards with the Eastern Beauty bundle. I also liked this the straight lines and the simple elegance of this card. Below is my version, I used the same layout but played around a little with new in-colours. 


Thank you for visiting my blog today, hope you have enjoyed browsing through my projects and found some inspirations. If you like what you see, please leave a comment or two below, or simply click on one of the reaction buttons to let me know what your thoughts are about my creations. I value your opinion and I am always looking to improve my craft through constructive feedback from my guests/readers. I am also looking to expand my audience base, so please feel free to share my creations within your social circle.

Thursday, 15 June 2017

Stampin Dreams Blog Hop - Carried Over products


Welcome to the Stampin' Dreams Blog Hop, running monthly. You are currently visiting Irene Rahman from Melbourne, Australia. I hope you enjoy my project/cards showcasing my favourite Carry Over Products from the old catalogue to the new one.

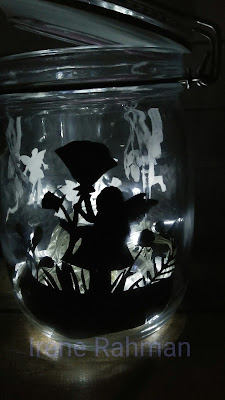
This is my first time playing along with Stampin' Dreams blog hop. The product that I have chosen to showcase is the Fairy Celebration stamp set. I got my inspiration from another of our Crazy Crafters team member, Rosalie Desmond's creation using the same stamp set. She used the idea of a silhouette beautifully and I straight away got the courage to act on an idea I had floating around in my mind for a while. I had a vision of a fairy glow jar, and this is what I was able to create. I'm not sure if this is exactly what I had in mind but its very close to it. If I was to do it again, I would probably use a Mason Jar instead of this one, and I would probably use few more silhouettes and use led tealight candle instead of string lights. But I'm pretty happy with how this turned out for my first attempt.


Needless to say that this project involved a lot of fussy cutting, and quite detailed fussy cutting as it is a silhouette, I had ensure that each little gaps are cut out with precision, allowing the lights to shine through as much as possible. 


No project is complete without a matching card to go with it. I used similar technique for the card as I used for the glow jar, but decided to add a patch of colour to shine some light on parts of the image of the fairy. For colouring in, I have used the watercolour pencils, I just love how this turned out. For the greeting at the bottom, I have used one of the greetings from the Birthday Delivery stamp set.


I hope the projects you've seen here on my blog today have inspired you & brightened your day. You are currently visiting Irene Rahman. Please see the list below & hop through all of the people on the list to see all our projects. You don't want to miss any!


Wednesday, 14 June 2017


This Month's Blog Highlights theme is BABY. I must say I struggled to find inspiration as I don't usually make a lot of cards in this theme. In doing this project, I also realised that I don't have any of the new Baby stamp sets from the new catalogue. It helped to highlight a gap in my collection which I didn't realise I had. As a result, I had to use a combination of old and new stamp sets, which worked worked out brilliantly I think. As I had heaps of fun making this project, I think I am taking a liking to baby cards.

For this project I have used the Zoo Babies stamp set (Old) and  the Lift Me Up and Up & Away thinlit dies (New) and Balloons Celebrations stamp set. In my mind, I had an image of an elephant being lifted up by either a bunch of balloons or a hot air Balloon. I tried both but decided to go with the hot air balloon which I thought made more of an impact.


For the colours, I have used powder pink ink and cardstock, flirty flamingo ink and cardstock, smoky slate ink and cardstock and whisper white cardstock. I've stamped the card front first with the little dandelynes from the Balloon Celebration stamp set in smoky slate, stamping off one time first.


I stamped the elephant first and cut out it out another image of the elephant manually and placed it on on top of the stamped image, giving it a shadow and a 3D effect. I did the same with the ears, adding a little bit more depth. Using quite a lot of dimensionals, I was able to give all the elements a bit of lift. 


For the inside, I stamped the smaller hot air balloons in Smoky Slate and cut out one piece and lifted it up using dimensionals. 


Thank you for visiting my blog today, hope you have enjoyed browsing through my projects and found some inspirations. If you like what you see, please leave a comment or two below, or simply click on one of the reaction buttons to let me know what your thoughts are about my creations. I value your opinion and I am always looking to improve my craft through constructive feedback from my guests/readers. I am also looking to expand my audience base, so please feel free to share my creations within your social circle.

Tuesday, 6 June 2017

Ramadan in a box


In the spirit of Ramadan, I have decided to integrate the concept of an Advent Calendar and make a Ramadan Calendar. And wouldn't you know it, Stampin' up has a suite of products just perfect for these types of occasions. Its called the 'Eastern Beauty' bundle. For this project I have also used the window box framelit dies. For the cardstock, I have used all of the new in colours and as well as Emerald Envy.
For those who doesn't know much about Ramadan, here is crash course:
Ramadan is the holiest month in the Islamic Calendar, when all Muslim people from all around the world, from different walks of life, fasts for 30 days. Fasting for Muslims means no eating or drinking anything at all from Sunrise to Sunset. Once sun sets for us during Ramadan, it is a time we spend with family, together we break our fast for the day, its time of sharing and giving thanks. Ramadan teaches us humility, as abstaining from food and water during daylight, we get to experience a little bit of what people with very little means have to endure everyday. Ramadan teaches us to be generous and kind to one another, and most importantly, it teaches us to be grateful for what we have. It puts our level of resilience, will power to test, pushes us to be better people. The end of Ramadan is marked by a grand celebrations, which lasts up to three days, this is known as Eid-Ul-Fitr or most people know it as 'Eid'. But don't expect it to be on again at the same time next year as the Islamic calendar follows the lunar cycle, so it means that the month of Ramadan starts at different times each year. Which is great I think because it keeps it exciting and interesting.


When I saw the 'Eastern Palace' suite of products, my mind went straightaway to thoughts of Ramadan, and I would love to share some of those ideas with you. I am planning to make all my Eid cards with these products, and I have also used these to make some Ramadan decorations. Here I would like to showcase a Ramadan Calendar I have made for my three boys. I usually make one for Christmas as well, this is the first time I am making one for Ramadan. I want them to be just as excited about Ramadan and Eid, just as much as they are about Christmas. To achieve that, I knew that I have to make it fun for them, and adding  a little treat doesn't hurt either. 


I have cut out 30 window boxes using the window box framelit dies, then put it through the big shot again with the Eastern Medallion framelit dies to cut out the patterns on top and sides. This was the hardest bit as it took quite a bit of time to cut out and assemble all these boxes. For the numbers, I have used the large numbers framelit dies, and a gold foil sheet.


For the inside I've an Eastern Meddalion with some information about Ramdan, a led tealight candle and some sweet treats for the boys to enjoy. The condition for getting a sweet treat is that they have to learn about Ramadan. Its working well so far.


I have placed all of the boxes on a round table I have in my family room, decorated it with a Sari I had in my collection and placed some lights around it. I also made a banner using the new in-colours card stock and the large letters framelit dies. 


Thank you for visiting my blog today, hope you have enjoyed browsing through my projects and found some inspirations. If you like what you see, please leave a comment or two below, or simply click on one of the reaction buttons to let me know what your thoughts are about my creations. I value your opinion and I am always looking to improve my craft through constructive feedback from my guests/readers. I am also looking to expand my audience base, so please feel free to share my creations within your social circle.