Saturday, 29 April 2017

Oh So Eclectic


I've thought long and hard about why SU have named this set "Oh So Eclectic", still haven't been able to come up with anything that seems reasonable and sound. I would love to hear your thoughts, feel free to leave a comment below.
Nevertheless, I'm just in love with this set. This is my second blog post about this set already and I'm sure it won't be the last. Here I have used the stain glass technique, where I have powder embossed the image in white on vellum paper. Turning the paper over, I have coloured in the flower on the reverse side with blender pen, in doing so I was able to achieve the look of stain glass image. I have used the new in colour Fresh Fig, and lemon lime twist.


Adhering vellum to card stock can be a bit tricky as it is transparent and the adhesive glue tends to show through, or there is often a discolouration on spots where there is adhesive. Leave it looking all spotty and discoloured. I used a trick I have learnt from one of the Onstage local presentations, can't quite remember her name right now, but she used a cotton bud to spread the adhesive glue all over the vellum, leaving only a thin layer on the surface, allowing it to stick without discolouring or leaving it looking spotty. Quite happy with how they turned out.
Other than the technique, it's a really straightforward card with a simple layout. I had to fussy cut out the flower and the leaves sitting on top of the greeting, as I don't yet have the coordinating thinlit dies, which I will be sure to get once the we are allowed to order them from the new catalogue at the beginning of June. 


I am an independent Stampin' Up Demonstator with a wealth of experience in crafting in various forms. I am very grateful for your visit today, and I hope that you've enjoyed looking at my projects. Hope you can stop by again really soon.

Thursday, 27 April 2017

Build It


Nailed It

For these projects I am using the "Nailed It" suite of products. Being the only female in my household, I am always looking for stamps and coordinating products that are suitable for men. I think you would agree that 90% of crafting products that are out there are targeted at a female audience. So one can imagine my excitement when this set was introduced by Stampin' Up. But I was very disappointing to find out recently that Stampin' Up is retiring this bundle. As it was one of the few masculine sets, I was hoping they would keep it. I am glad that I got this set, and more importantly, I was able to make good use of it, and it is definitely one that is going in my "keeping it" basket. I made these cards for my husband's 39th and my Father-in-law's 65th Birthday. 


My little man made a card for Pops himself, he didn't want me to make one for him. Great effort for a four years old.

Wednesday, 26 April 2017

Make and Take


I know that you I have spoken a lot about Onstage Local event for the past couple of weeks, but I really had a great time and ripped many benefits. As indicated in earlier posts, it was a very worthwhile event as it marked the unveiling of the new Annual Catalogue. We were the first ones to view the new catalogue in Australia, and we also had an opportunity to play with some of the new products as make and take projects. Here are the make & take projects I made, they are really quite simple cards, easy to do and super quick to make.


This suite is called wood textures with Wood Words stamp set, Wood Textures designer series paper and I am particularly excited about the Wood Crate framelits dies. These are three cards that fits within the create. 


This card is made with the Colour Theory suite. The background and the flower is from the Colour Theory Memories and More card stack, stamped with Colourful seasons stamp set.


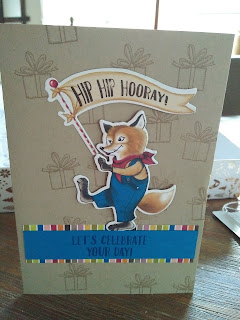
This is made with the Birthday memories suite. Stamped with Birthday Delivery stamp set, the fox is cut out of the Birthday Memories Designer Series paper.


This is made with the Delightful Daisy suite. Stamped with Daisy Delight stamp set and cut out with a Daisy punch, completed with strips of Delightful Daisy Designer Series paper.


Tuesday, 25 April 2017

Washi Tape Easter


If you have a lot of Washi tapes laying around, this is the card for you. Here are few very easy designs for Easter cards. To make the eggs, I stuck the Washi tapes one strip at a time next to each other on whisper white card stock paper. Then using the layering oval thinlit dies to cut out the egg. The layering ovals comes in various sizes, so you can cut different sizes. I stamped the diferent backgrounds with a retiring stamp set called Gorgeous Grunge, it's still available for a couple of more weeks. 
All that is left is to add your greeting and embellishment to tie it all together. Then you'll yourself a beautiful card that looks amazing that didn't take too long to make. In case you're wondering, for the strands of hay the eggs are sitting on, I used the artificial ones you get from the $2 shops that you put in Easter baskets.


Monday, 24 April 2017

Mother's Day candles


Mother Day is about two weeks away and I have recently  made about 50 natural soy candles for sale specially for the occasion. Could not think of a better way to decorate them than with the belly band from the So Detailed thinlit dies and the falling in love designer series paper. This suite of products are really quite beautiful, delicate and elegant. which is the very embodiment of Mother's Day!! I think it was a perfect match. I feel really quite gutted that these product are on the retiring list, which means that they will not be available for purchase after this month. I have used mine quite a bit and can see many more use for it in future, definitely keeping them. 
It was super easy to decorate the candles, although my Big Shot cutting pads did take quite a beating in the process. Cutting out 50 of these delicate belly bands can take its toll on the poor acrylic cutting pads, I think I might have to retire them after this project.


Saturday, 22 April 2017

Swaps


What's great about sharing your swaps with other paper crafters is that you get to take home some really amazing card fronts and little gifts. The shares for this year's Onstage Local event were amazing, I am always blown away with their spirit of generosity. Its clear to see the effort and time everyone has put into create these spectacular projects. Below are the shares other crafters have shared with me, I am sure you'll agree, they are all really quite clever. Thanks everyone for your generosity. Scroll over the image to find out who created them.